* 동적 인라인 스타일 설정
<div className='expense_item' style={{color : 'red'}}>
</div>
스타일을 동적으로 할당하는 방법은 이전 게시물에도 적었듯이, style태그 객체를 인라인으로 선언해주는 방법이 있다.
그럼 조건에 따라 스타일이 할당되기 위해서는 어떻게 해야할까,
만약 입력받는 text가 공백일 경우 빨강색으로, text가 유효할 경우 초록색으로 바꾸고 싶다.
우선, 상태가 변경되기 때문에 state를 사용해서 상태를 체크해줘야한다.
const CourseInput = props => {
  const [enteredValue, setEnteredValue] = useState('');
  const [isValid, setIsValid] = useState(true);

  const goalInputChangeHandler = event => {
  	//만약 현재 들어온 input text의 길이가 0보다 길면
    if(event.target.value.trim().length > 0){
    //유효하다 판단해서 true
      setIsValid(true);
    }
    setEnteredValue(event.target.value);
  };

  //입력된 값이 유효한지 확인해주는 formSubmitHandler
  const formSubmitHandler = event => {
    event.preventDefault();
    //만약 input text.trim().길이가 0이면
    if(enteredValue.trim().length === 0){
    //유효하지 않다 판단해서 false 판단 뒤 return
      setIsValid(false);
      return;
    }
    //유효한지 확인은 onAddGoal이 실행되기 전에 해줘야한다.
    props.onAddGoal(enteredValue);
  };

  return (
    <form onSubmit={formSubmitHandler}>
      <div className="form-control">
      //삼항연산자 활용해서 style적용시킨다.
      //스타일: 조건 ? 조건ture일시 : 조건false일시
        <label style={{color: !isValid ? 'red' : 'green'}}>Course Goal</label>
        <input type="text" onChange={goalInputChangeHandler}
          style={{borderColor: !isValid ? 'red' : 'green', backgroundColor : !isValid ? 'salmon' : 'transparent'}}/>
      </div>
      <Button type="submit">Add Goal</Button>
    </form>
  );
};
//transparent: 투명색
useState를 활용하여 style을 동적으로 할당해준다.
formSubmitHandler함수에서는 onAddGoal이 실행되기 전에 값이 유효한지 확인해줘야하기 때문에,
이전에 input된 text가 공백인지 체크해줘야한다.
다만, 인라인으로 할당한 css는 외부 css파일보다 우선시되기 때문에 다른 방안을 찾는 것을 권장.
* 동적 CSS 클래스 설정
`` 템플릿 리터럴을 사용, 백틱 사이에 입력되는 것은 문자열로 취급된다.
.form-control.invalid input{
  border-color: red;
  background-color: #ffd7d7;
}

.form-control.invalid label{
  color: red;
}
return (
<form onSubmit={formSubmitHandler}>
<div className={`form-control ${!isValid ? 'invalid' : ''}`}>
<label>Course Goal</label>
<input type="text" onChange={goalInputChangeHandler} />
</div>
<Button type="submit">Add Goal</Button>
</form>
);템플릿 리터럴 내부에 ${}를 사용하면, JSX코드 내부에서 html문법을 사용하는 것과 같이 자바스크립트를 사용할 수 있다.
백틱 `` 내부에 동적으로 할당할 클래스 이름을 설정해준다. (삼항연산자 사용)
${조건 ? 조건이 true일때 : 조건이 false일 때}
*styled component
styled-components
Visual primitives for the component age. Use the best bits of ES6 and CSS to style your apps without stress 💅🏾
styled-components.com
styled-components: 특정 스타일이 포함된 컴포넌트를 구축할 수 있도록 도와주는 패키지, 이 스타일이 첨부되는 컴포넌트에만 영향을 미치고 다른 컴포넌트에는 전혀 영향을 미치지 않는다.
styled-components 패키지 설치
npm i --save styled-components
+) Tagged Template Literals ?
Template literals (Template strings) - JavaScript | MDN
Template literals are literals delimited with backtick (`) characters, allowing for multi-line strings, string interpolation with embedded expressions, and special constructs called tagged templates.
developer.mozilla.org
https://mygumi.tistory.com/395
Tagged Template Literals 문법 :: 마이구미
이 글은 "Tagged Template Literals" 문법을 다룬다. 이 문법은 직접 구현해서 사용하는 경우는 흔치 않지만 이미 여러 라이브러리에서 활용하고 있어 쉽게 접할 수 있다. MDN - https://developer.mozilla.org/ko/do
mygumi.tistory.com
// import React from 'react';
//얘는 지워줘도 된다. 왜냐면 여기서 더이상 JSX 를 사용하지 않기 때문.

//styled는 styled-components에서 임포트하는 객체이고 button메소드에 접근할 수 있다.
import styled from 'styled-components';

//tagged template literals
//button은 styled객체의 메소드
//button() 괄호붙여서 호출하는 메소드 대신 백틱을 붙여서 호출한다.
//백틱 안에 입력한 것이 button 메서드 안에 들어간다.
//그리고 이 button메서드가 button 컴포넌트를 반환한다는 것.
const Button = styled.button`
    font: inherit;
    padding: 0.5rem 1.5rem;
    border: 1px solid #8b005d;
    color: white;
    background: #8b005d;
    box-shadow: 0 0 4px rgba(0, 0, 0, 0.26);
    cursor: pointer;

  &:focus {
    outline: none;
  }

  &:hover,
  &:active {
    background: #ac0e77;
    border-color: #ac0e77;
    box-shadow: 0 0 8px rgba(0, 0, 0, 0.26);
  }
`;


// const Button = props => {
//   return (
//     <button type={props.type} className="button" onClick={props.onClick}>
//       {props.children}
//     </button>
//   );
// };

export default Button;
styled-component를 통해 전역으로 적용되는 css가 아닌, 해당 컴포넌트 내에서만 동작하는 css를적용할 수 있다.
const Button = styled.button``;
백틱 내부에 선언하는 스타일은 button메서드에 적용되어 새로 출력되는 button 컴포넌트에 적용되는 스타일이다.
button에 적용하는 스타일의 경우 따로 className을 설정하지 않아도 된다.
button에 적용되는 효과의 경우, className이 따로 없기 때문에 & 사용해서 &:hover 등으로 표현해 스타일을 적용할 수 있다.
하나의 컴포넌트 내부에 여러 컴포넌트가 존재할 때에도 styled-components를 사용 가능하다.
import React, { useState } from 'react';
import styled from 'styled-components';

import Button from '../../UI/Button/Button';
import './CourseInput.css';

const FormControl = styled.div`
    margin: 0.5rem 0;

  & label {
    font-weight: bold;
    display: block;
    margin-bottom: 0.5rem;
  }

  & input {
    display: block;
    width: 100%;
    border: 1px solid #ccc;
    font: inherit;
    line-height: 1.5rem;
    padding: 0 0.25rem;
  }

  & input:focus {
    outline: none;
    background: #fad0ec;
    border-color: #8b005d;
  }

  &.invalid input{
    border-color: red;
    background-color: #ffd7d7;
  }

  &.invalid label{
    color: red;
  }
`;

const CourseInput = props => {
  const [enteredValue, setEnteredValue] = useState('');
  const [isValid, setIsValid] = useState(true);

  const goalInputChangeHandler = event => {
    if(event.target.value.trim().length > 0){
      setIsValid(true);
    }
    setEnteredValue(event.target.value);
  };

  //입력된 값이 유효한지 확인해주는 formSubmitHandler
  const formSubmitHandler = event => {
    event.preventDefault();
    if(enteredValue.trim().length === 0){
      setIsValid(false);
      return;
    }
    //유효한지 확인은 onAddGoal이 실행되기 전에 해줘야한다.
    props.onAddGoal(enteredValue);
  };

  return (
    <form onSubmit={formSubmitHandler}>
      <FormControl  className={!isValid && 'invalid'}>
        <label>Course Goal</label>
        <input type="text" onChange={goalInputChangeHandler} />
      </FormControl>
      <Button type="submit">Add Goal</Button>
    </form>
  );
};
//transparent: 투명색


export default CourseInput;
const 로 선언해주는 변수명은 대문자여야한다. (왜냐하면 컴포넌트화될거기 때문에 대문자여야 함..!)
이경우 className에 동적으로 설정하는 방법엔, FormControl 컴포넌트에 직접 className을 설정해주는 방법이 있다.
이미 FormControl은 고유한 className을 가지고 있기 때문에 조건에 따라 변화하는 className만 설정해주면 되는데,
!isValid && 'invalid'로 설정해주면 된다. (= false일 때만 추가되고 true일때는 추가되는 class가 없기 때문에 만약 true false에 따라 추가되는 클래스명이 다르다면 삼항연산자 사용해주면 됨)
그럼 이렇게 추가하는 방법 외에 다른 방법은 없을까?
const FormControl = styled.div`
    margin: 0.5rem 0;

  & label {
    font-weight: bold;
    display: block;
    margin-bottom: 0.5rem;
    color: ${props => props.invalid ? 'red' : 'black'}
  }

  & input {
    display: block;
    width: 100%;
    border: 1px solid ${props => props.invalid ? 'red' : '#ccc'};
    background: ${props => props.invalid ? '#ffd7d7' : '#transparent'}
    font: inherit;
    line-height: 1.5rem;
    padding: 0 0.25rem;
  }

  & input:focus {
    outline: none;
    background: #fad0ec;
    border-color: #8b005d;
  }
`;
return (
<form onSubmit={formSubmitHandler}>
<FormControl invalid={!isValid}>
<label>Course Goal</label>
<input type="text" onChange={goalInputChangeHandler} />
</FormControl>
<Button type="submit">Add Goal</Button>
</form>
);
FormControl이라는 style-components로 생성한 컴포넌트에서 className을 조건부로 추가하는 또 다른 방법은,
추가하려는 className={조건}을 부여하는 방식으로 이루어진다.
이 경우, css에서 props를 이용한 삼항연산자를 통해 조건에 맞는 css를 부여하면 된다 !!!
* 미디어 쿼리
모바일 화면에서 보여지는 css와 웹 화면에서 보여지는 css 를 다르게 적용하고 싶을 때 사용
const Button = styled.button`
    width: 100%;
    font: inherit;
    padding: 0.5rem 1.5rem;
    border: 1px solid #8b005d;
    color: white;
    background: #8b005d;
    box-shadow: 0 0 4px rgba(0, 0, 0, 0.26);
    cursor: pointer;

    @media(min-width:768px){
      width: auto;
    }
 `
너비가 ~768px이면 width:auto를 적용하고, 이보다 클 경우 width:100%를 적용시킨다.
*CSS 모듈
리액트 프로젝트는 css 모듈을 지원하도록 설정되어 있다.
style-components 패키지를 사용하여 js내부에서 css코드를 사용하는 것이 아니라,
전역 css 파일 코드를 내가 원하는 컴포넌트에만 적용시키기 위해서 CSS 모듈이 활용된다.
import styles from './Button.module.css';import './Button.css';css모듈을 사용하기 위해서는 기존의 css파일 임포트 방식이 아닌, 객체명을 지정해 임포트해야한다.
또한, css파일명을 Button.module.css로 변경해줘야한다.
이는 css모듈이 작동하도록 코드를 변환하라고 컴파일 프로세스에 보내는 신호이다.
const Button = props => {
  return (
    <button type={props.type} className={styles.button} onClick={props.onClick}>
      {props.children}
    </button>
  );
};
이후 컴포넌트 내부에서 button의 className에 동적으로 className={styles.button}을 부여하게 되면,
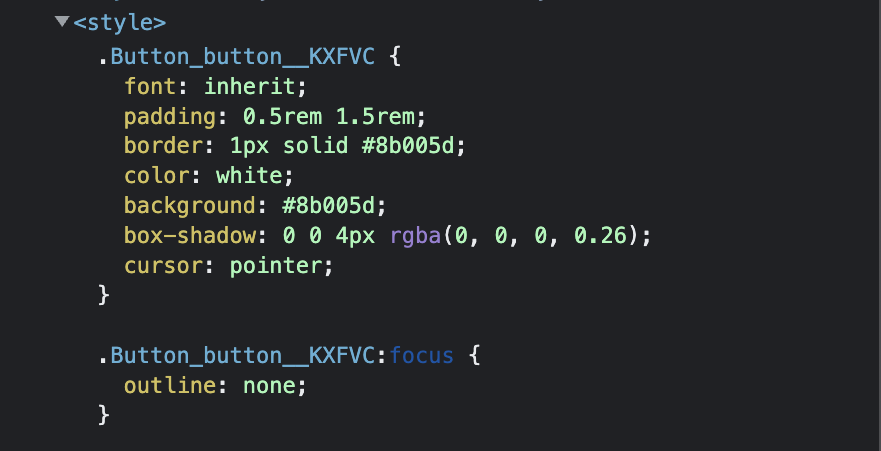
클래스명이 Button_클래스명__고유한값 으로 지정된 것을 알 수 있다.
이는 css모듈을 통해 css파일에서 읽어온 클래스명을 기존의 컴포넌트에 동적으로 연결한 것!
  return (
    <form onSubmit={formSubmitHandler}>
      <div className={`${styles['form-control']} ${!isValid && styles.invalid}`}>
        <label>Course Goal</label>
        <input type="text" onChange={goalInputChangeHandler} />
      </div>
      <Button type="submit">Add Goal</Button>
    </form>
  );
조건에 따라 className을 추가하고싶을 때엔 ``과 ${}을 사용해준다.
백틱 내부에 넣고 싶은 문자열을 적어 넣으면 되는데, css모듈을 통해 연결하는 className은 -로 연결되어있을 경우 styles['form-control']이라고 작성하면 된다.
또한 다음 조건을 추가할 때엔 새로운 ${}안에 조건과 추가할 className을 적어주면 되는데, false일 때 추가할 클래스명이 없다면 && 사용해서 클래스명을 추가해주면 된다.(기존과 다른점은 styles.invaild인 것, invalid가 아니라)
'FE·Client > React' 카테고리의 다른 글
| [React] sideEffect() 와 useEffect() (0) | 2023.01.17 |
|---|---|
| [React] Portals, Ref, uncontrolled component (0) | 2023.01.11 |
| [React] 동적 배열 할당, 조건부 렌더링 (1) | 2023.01.06 |
| [React] props.childern, State, 상향식 컴포넌트 통신(자식컴포넌트에서 부모컴포넌트로 데이터 넘기기), 상태 끌어올리기(Lifting State Up) (0) | 2023.01.04 |
| [React] React 초기 설정, JSX, toISOString, props, toLocalString() (1) | 2022.12.27 |